Butterfinger Balls: Irresistible No-Bake Candy for Every Occasion
If you’re looking for a sweet treat that’s crunchy, creamy, and absolutely addictive, Butterfinger Balls are your answer. These no-bake candies combine the irresistible crunch of Butterfinger candy bars with smooth peanut butter, rich chocolate, and a hint of vanilla, making them a perfect homemade snack for parties, holidays, or just indulging yourself. This article will guide you step-by-step on how to make Butterfinger Balls with precision and ease.
🍫 What Are Butterfinger Balls?
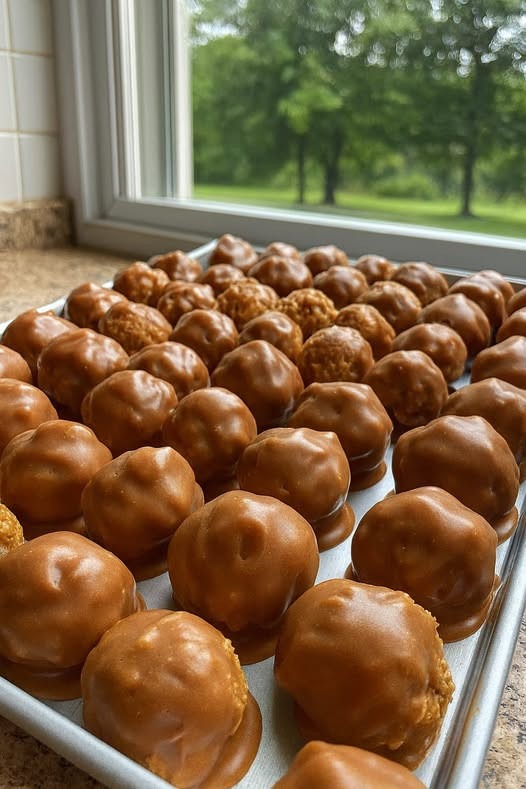
Butterfinger Balls are bite-sized, no-bake confections made by combining crushed Butterfinger bars with creamy peanut butter, forming them into balls, and coating them in a layer of chocolate. They are crunchy, sweet, and melt-in-your-mouth delicious, yet surprisingly simple to make. Perfect for gift-giving or a weekend treat, they capture the essence of classic Butterfinger candy in a homemade version.
🛒 Ingredients
For the Candy Base:
- 4–5 Butterfinger candy bars (or about 8 ounces), crushed finely
- 1 cup creamy peanut butter
- 1 teaspoon vanilla extract
For the Chocolate Coating:
- 12 ounces semi-sweet or milk chocolate, chopped
- 1 tablespoon shortening or coconut oil (optional, for smooth coating)
Optional Garnishes:
- Crushed Butterfinger pieces for sprinkling
- Colored sprinkles for festive occasions
👩🍳 Step-by-Step Instructions
Step 1: Prepare the Candy Base
- Place the Butterfinger bars in a large zip-top bag. Use a rolling pin or a food processor to crush them into fine crumbs. You want small, even pieces for the best texture.
- Transfer the crushed Butterfinger pieces to a large mixing bowl.
- Add 1 cup of creamy peanut butter and 1 teaspoon of vanilla extract to the bowl.
- Mix everything together thoroughly with a spatula or your hands. The mixture should be sticky enough to hold together but not too wet. If it’s too dry, add a little more peanut butter, one tablespoon at a time.
Step 2: Form the Balls
- Using your hands or a small cookie scoop, scoop out portions of the mixture and roll them into 1-inch balls.
- Place the formed balls on a parchment-lined baking sheet.
- Refrigerate the balls for at least 30 minutes to firm up — this makes dipping in chocolate much easier.
