home. Serve it warm with ice cream for a classic dessert experience, or enjoy it on its own with a glass of milk. No matter how it is served, this dessert delivers comfort, nostalgia, and indulgence in every bite.
In this complete guide, you will learn how to make the perfect Easy Chocolate Chip Cookie Pie from start to finish. You will also find helpful baking tips, ingredient variations, storage advice, serving suggestions, and calorie information.
Preparation Time
Preparation Time: 15 minutes
Baking Time: 35–45 minutes
Cooling Time: 15–20 minutes
Total Time: Approximately 1 hour 15 minutes
Ingredients
For the Cookie Pie
1 cup unsalted butter, melted and slightly cooled
1 cup brown sugar, packed
1/2 cup granulated sugar
2 large eggs, room temperature
1 tablespoon vanilla extract
2 1/4 cups all-purpose flour
1 teaspoon baking soda
1/2 teaspoon salt
2 cups semi-sweet chocolate chips
Optional Add-Ins
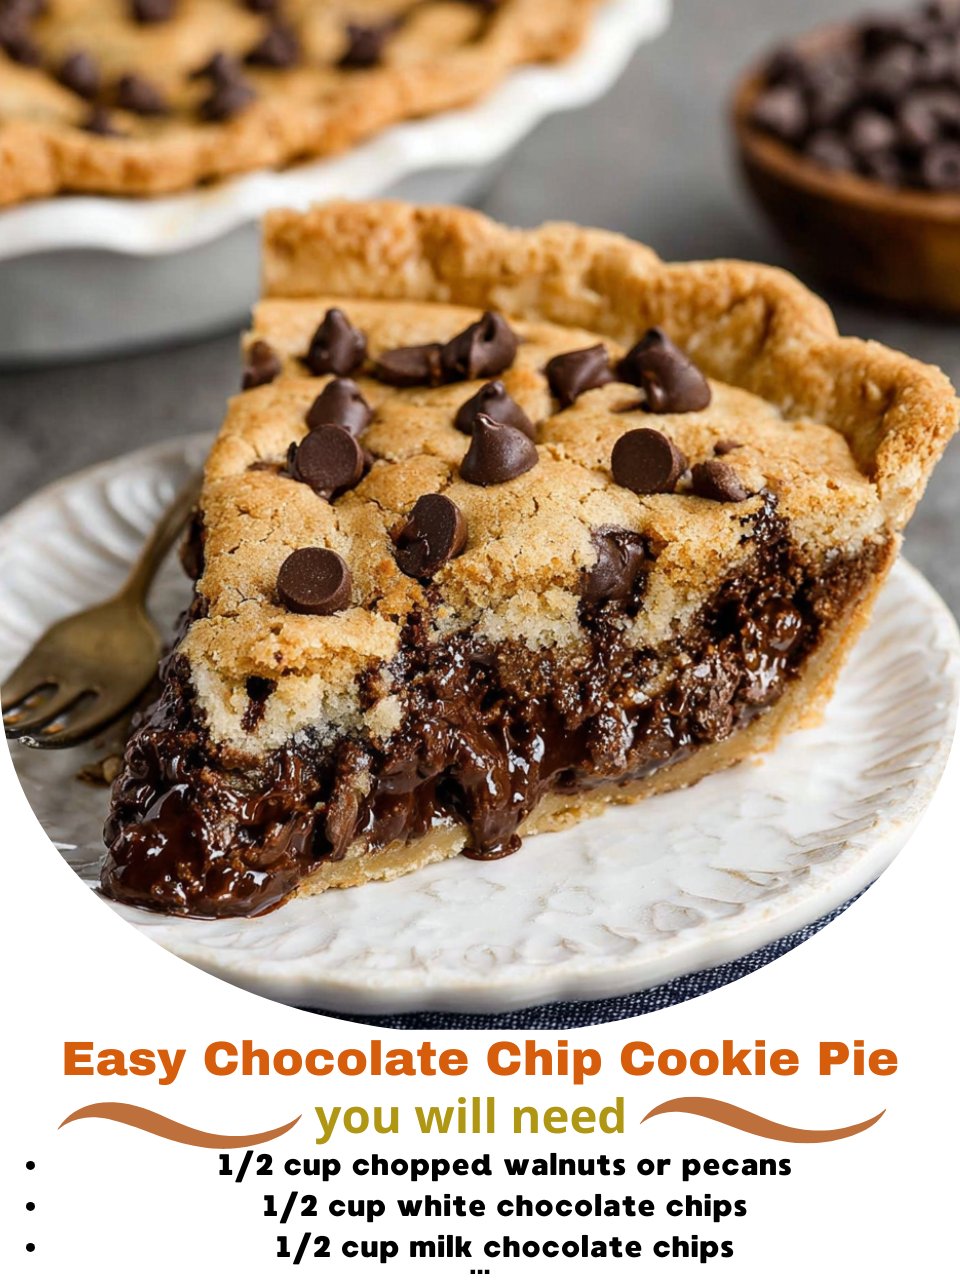
1/2 cup chopped walnuts or pecans
1/2 cup white chocolate chips
1/2 cup milk chocolate chips
For the Pie Dish
Nonstick spray or butter for greasing
How to Prepare Easy Chocolate Chip Cookie Pie
This cookie pie comes together in a few simple steps: mixing the dough, filling the pie dish, baking until golden, and allowing it to cool slightly before slicing.
Step 1: Preheat the Oven and Prepare the Dish
Preheat your oven to 350 degrees Fahrenheit (175 degrees Celsius).
Grease a 9-inch pie dish generously with butter or nonstick spray.
Set the prepared dish aside.
Using a well-greased dish ensures the cookie pie releases easily after baking.
Step 2: Mix the Wet Ingredients
In a large mixing bowl, combine the melted butter, brown sugar, and granulated sugar.
Whisk until the mixture is smooth and glossy.
Add the eggs one at a time, whisking well after each addition.
Stir in the vanilla extract.
The mixture should look thick, smooth, and slightly creamy.
Step 3: Combine the Dry Ingredients
In a separate bowl, whisk together the flour, baking soda, and salt.
Mix until evenly combined.
This step ensures the leavening and salt are evenly distributed throughout the dough.
Step 4: Make the Cookie Dough
Gradually add the dry ingredients to the wet ingredients.
Stir gently with a spatula or wooden spoon until just combined.
Avoid overmixing, as this can make the cookie pie dense.
The dough will be thick and sticky, similar to traditional cookie dough.
Step 5: Add the Chocolate Chips
Fold the chocolate chips into the dough until evenly distributed.
If using nuts or additional chips, fold them in at this stage.
Make sure the chocolate is spread evenly for consistent bites.
Step 6: Fill the Pie Dish
Spoon the cookie dough into the prepared pie dish.
Spread it evenly using a spatula or the back of a spoon.
Smooth the top gently.
For extra presentation, sprinkle a few chocolate chips on top before baking.
Step 7: Bake the Cookie Pie
Place the pie dish in the center of the preheated oven.
Bake for 35–45 minutes.
The edges should be golden brown, while the center should still look slightly soft.
If the top begins browning too quickly, loosely cover with foil during the last 10 minutes.
Step 8: Cool and Serve
Remove the cookie pie from the oven.
Allow it to cool for 15–20 minutes before slicing.
The cookie pie will continue to set as it cools, but the center will remain soft and gooey.
Tips for the Perfect Chocolate Chip Cookie Pie
1. Do not overbake
A slightly underbaked center creates the best gooey texture.
2. Use room-temperature eggs
They blend more easily into the batter and improve texture.
3. Measure flour accurately
Too much flour can make the pie dry.
4. Let it cool before slicing
This helps the slices hold their shape.
5. Use good-quality chocolate
Better chocolate means better flavor.
Texture Guide: How to Customize the Bake
Gooey center: Bake 35–38 minutes
Soft and chewy: Bake 40–42 minutes
Firm and sliceable: Bake 43–45 minutes
Everyone prefers cookie pie differently, so adjust baking time to your liking.
Flavor Variations
Classic Chocolate Chip
Use semi-sweet chocolate chips only.
Double Chocolate Cookie Pie
Add 1/4 cup cocoa powder and reduce flour by 1/4 cup.
Peanut Butter Chocolate Chip
Swirl 1/2 cup peanut butter into the dough before baking.
Salted Chocolate Chip
Sprinkle flaky sea salt on top after baking.
Holiday Cookie Pie
Add red and green chocolate candies or white chocolate chips.
Serving Suggestions
Easy Chocolate Chip Cookie Pie is delicious on its own, but even better when paired with:
Vanilla ice cream
Chocolate ice cream
Whipped cream
Chocolate or caramel sauce
Fresh berries
Serve warm for the best flavor and texture.
Make-Ahead Instructions
Make Ahead
Prepare and bake the cookie pie up to 1 day in advance.
Store covered at room temperature.
Freeze
Wrap cooled slices tightly and freeze for up to 2 months.
Thaw at room temperature or warm briefly in the oven.
Storage Instructions
Room temperature: Up to 2 days, covered
Refrigerator: Up to 5 days
Freezer: Up to 2 months
Reheat slices in the oven at 300 degrees Fahrenheit for 5–7 minutes.
Calories
Calories depend on slice size and add-ins. On average:
Approximately 380–450 calories per slice
(based on 8 slices)
Using fewer chocolate chips or smaller portions will reduce calories slightly.
Why This Recipe Works
This Easy Chocolate Chip Cookie Pie works because it balances fat, sugar, and flour perfectly. Melted butter creates richness, brown sugar adds moisture, and baking soda provides just enough lift. Baking the dough in a pie dish allows the edges to crisp while the center stays soft, giving the dessert its signature texture.
It is forgiving, adaptable, and consistently delicious, making it a reliable recipe for both casual baking and special occasions.
Final Thoughts
Easy Chocolate Chip Cookie Pie is the ultimate comfort dessert. It brings together everything people love about homemade cookies and elevates it into a warm, shareable treat that feels special without being complicated. Whether served at a celebration or enjoyed quietly at home, this dessert delivers warmth, nostalgia, and indulgence in every slice.
With simple ingredients, clear steps, and endless variations, this recipe deserves a permanent place in your dessert collection.

