Humidity: If you live in a dry climate, mist the leaves daily or use a humidifier.
Fertilizing: Apply a balanced organic fertilizer every 6–8 weeks to encourage healthy growth.
Pruning: Trim any dead or diseased branches to promote air circulation and shape the plant.
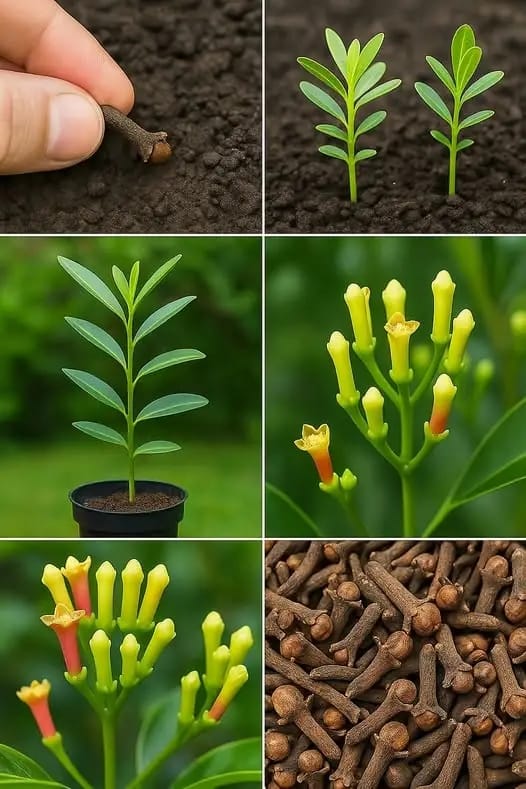
5. Flowering and Harvesting Cloves
Be patient — clove trees take time to mature. Under ideal conditions, they begin to flower after 5–7 years. The buds appear in clusters and gradually change from green to pink.
Harvesting:
Pick the buds while they’re still pink and before the flowers open. Dry them in the shade for 4–5 days until they turn dark brown. Store the dried cloves in an airtight container away from direct sunlight.
6. Enjoying the Rewards
Even before flowering, clove plants offer a delightful reward — their aromatic leaves. The leaves release a soft, spicy scent when rubbed, making them a natural air freshener. You can also crush them into homemade potpourri or infuse them in oils for a soothing, fragrant blend.
7. Common Problems and Solutions
Yellow leaves: Usually caused by overwatering. Let the soil dry slightly between waterings.
Slow growth: Ensure the plant is warm enough and receives sufficient filtered sunlight.
Pests: Occasionally, aphids or mites may appear. Treat them naturally with neem oil or soapy water sprays.
Final Thoughts
Growing cloves at home is a lesson in patience and care — but the payoff is deeply satisfying. From their glossy evergreen leaves to their intoxicating aroma, these trees bring a touch of the tropics to your home. With consistent warmth, moisture, and love, you can enjoy the charm and scent of cloves year-round, right from your windowsill or balcony.
