Instructions
1. Heat the Milk
Pour the milk into a heavy-bottomed pot. Warm it over medium heat, stirring occasionally to prevent a skin from forming. Heat until it is steamy and just begins to simmer with small bubbles around the edges. Do not let it boil.
2. Curdle the Milk
Remove the pot from the heat. Slowly pour in the vinegar while stirring gently. Almost instantly, you will see soft white curds (solids) separate from the thin, yellowish whey (liquid). Let the pot sit undisturbed for 5 minutes to allow the curds to fully develop.
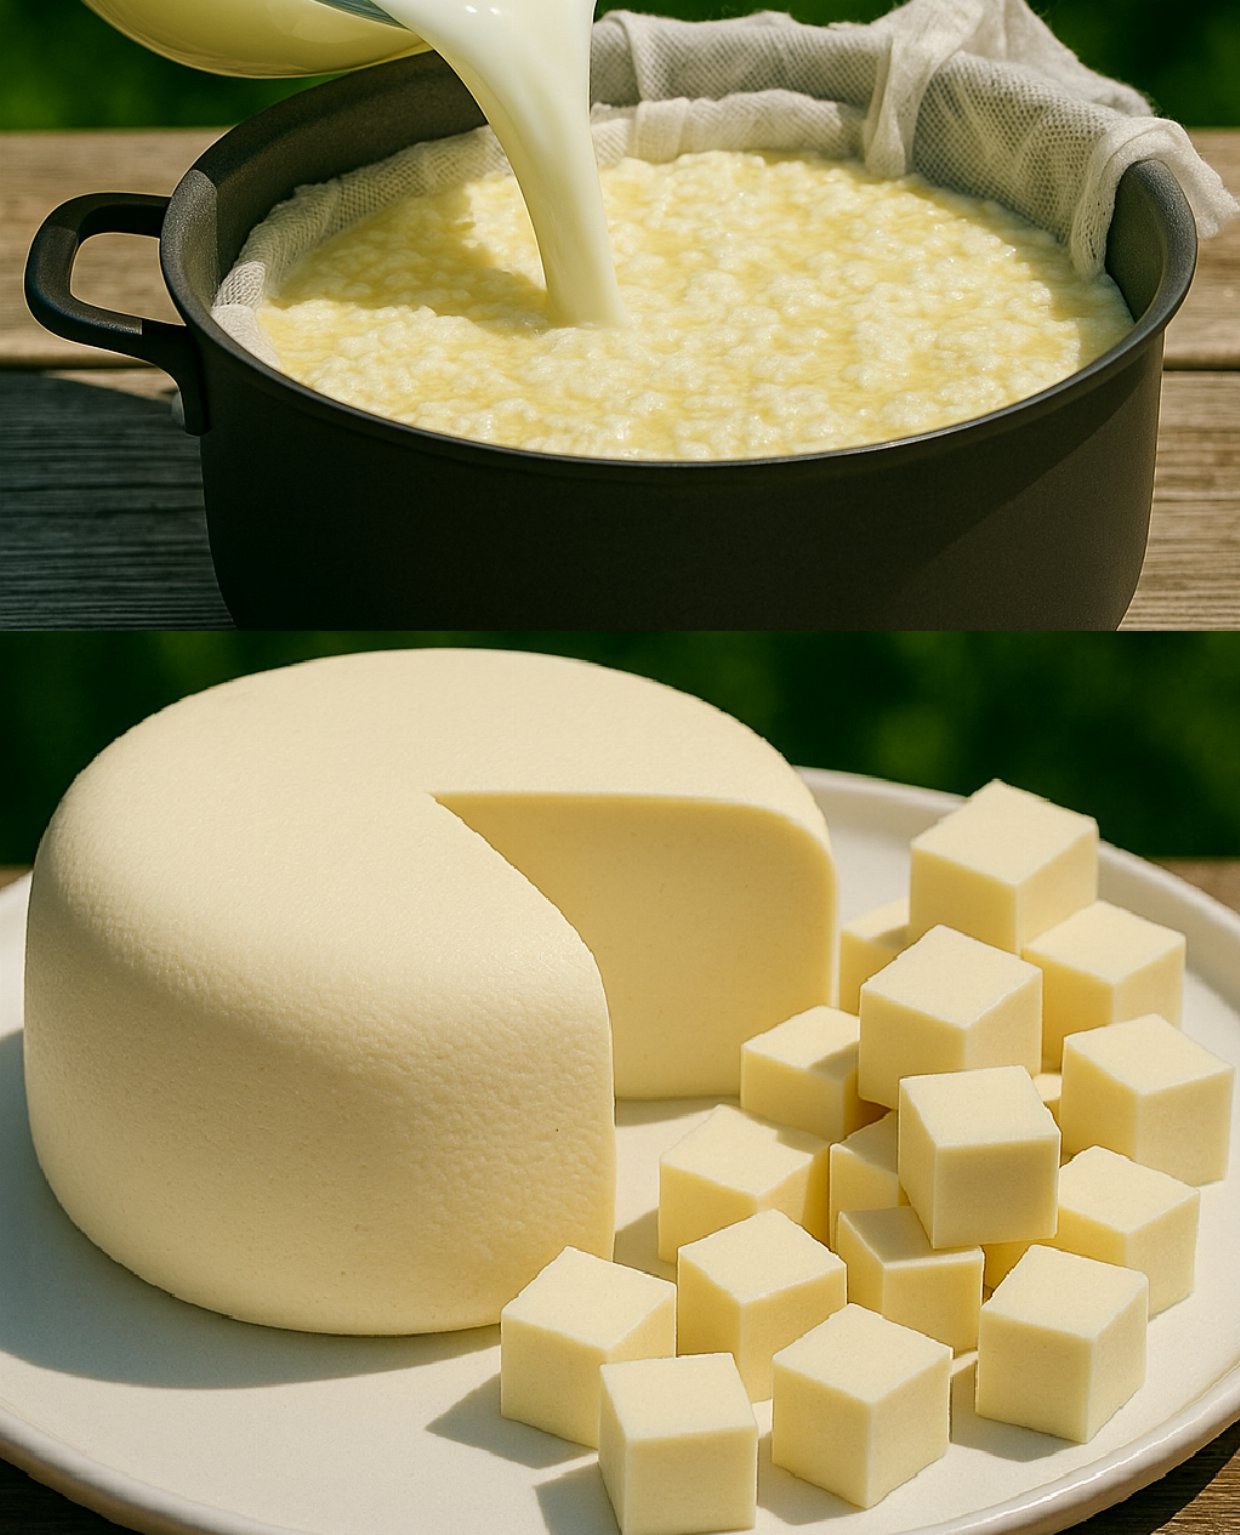
3. Strain the Curds
Set a colander or strainer over a large bowl and line it with cheesecloth or a thin, clean kitchen towel. Carefully pour the curds and whey into the lined colander. Let the whey drain away for 10-15 minutes.
4. Season the Cheese
Once the cheese is cool enough to handle, gather the edges of the cloth and gently squeeze to remove any excess whey. Transfer the curds to a bowl. Add salt, melted butter, and herbs. Mix gently until everything is well combined.
5. Shape and Set
You can now enjoy the cheese soft and spreadable. For a firmer, sliceable consistency, press it into a small bowl or ramekin, cover, and refrigerate for at least 1 hour before serving.
Chef’s Notes
Milk Matters: For the best yield and texture, use fresh, full-fat milk. Ultra-pasteurized milk often results in a poor curdle and a grainy texture.
Whey Not Use It? Don’t discard the nutrient-rich whey! It’s a fantastic substitute for water in bread, pizza dough, or smoothies.
Get Creative: This is a perfect base for experimentation. Try mixing in cracked black pepper, chili flakes, garlic powder, or fresh dill.
