
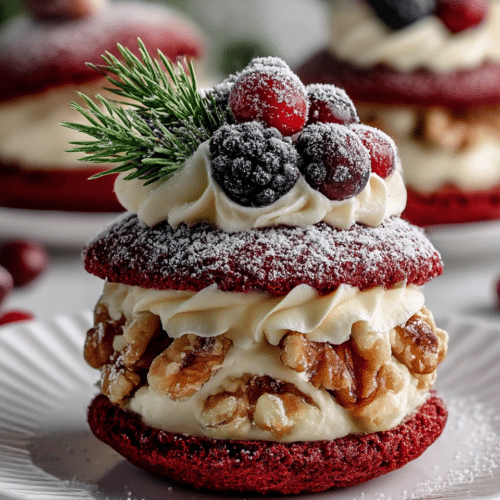
There’s something undeniably magical about baking during the holidays — the warmth of the oven, the sweet aroma of cocoa and vanilla, and the joyful anticipation of sharing homemade treats. One dessert that captures all this winter wonder is Red Velvet Wreath Whoopie Pies. With their vibrant color, creamy filling, and elegant wreath design, these little cakes aren’t just desserts — they’re a celebration on a plate.
Combining the classic charm of red velvet with the whimsy of whoopie pies, this recipe brings together a soft, cake-like texture and a tangy cream cheese center. The addition of candied walnuts, fresh berries, and a dusting of powdered sugar adds both texture and a festive flair. Whether you’re hosting a cozy family gathering or looking for a showstopper for your holiday dessert table, these wreath whoopie pies are a crowd-pleaser.
Looking for inspiration for more holiday confections? Check out the indulgent Cannoli Cookies — they pair beautifully with these pies and share the same seasonal spirit.
Sweet Navigation
Why Red Velvet Wreath Whoopie Pies Are the Star of Holiday Baking
The Seasonal Charm of Edible Wreath Desserts
Wreaths have long symbolized celebration, unity, and welcome—making them a fitting inspiration for a winter dessert. Red Velvet Wreath Whoopie Pies take this festive shape and translate it into a treat that’s both beautiful and meaningful. Their round structure, piped frosting, and delicate garnishes give the impression of a miniature wreath, creating an instant visual impact.
Beyond aesthetics, these pies offer a thoughtful presentation that feels homemade yet elegant. When dusted with powdered sugar and topped with cranberries or rosemary sprigs, they capture the wintry mood without needing elaborate tools or techniques.
Red Velvet’s Nostalgic Winter Flavor
Red velvet is a dessert that evokes strong seasonal associations. The mild cocoa base, subtle tang from buttermilk, and signature red hue give it a timeless appeal that’s particularly suited to colder months. Unlike richer chocolate desserts, red velvet is light on the palate but still indulgent—perfect for after a hearty meal or as part of a dessert spread.
The pairing with cream cheese frosting enhances the nostalgic quality. It’s a combination that many associate with birthdays, holidays, and classic Southern baking. Add candied walnuts and fresh berries, and these whoopie pies strike the right balance between familiar and festive.
Ingredients and Tools You’ll Need

Baking the Perfect Red Velvet Cake Rounds
The base of these whoopie pies starts with a simple yet effective red velvet batter. The ingredients include all-purpose flour, unsweetened cocoa powder, baking soda, and a pinch of salt—key elements for achieving the soft, cake-like texture. Light brown sugar adds moisture and a deeper flavor than white sugar, while buttermilk gives the batter its signature tang.
To achieve the classic red hue, a tablespoon of red food coloring is used, balanced with vanilla extract to round out the flavor. The batter should be smooth, thick enough to hold its shape when piped, and airy to ensure the cakes rise evenly in the oven. Using a piping bag or cookie scoop helps to create uniform 2-inch rounds, which bake evenly and form a soft exterior that’s ideal for sandwiching.
Cream Cheese Frosting: Tips for Silky Texture
A well-balanced cream cheese frosting can make or break a whoopie pie. This recipe calls for softened cream cheese and butter as the base, beaten until completely smooth. Powdered sugar is added gradually to maintain a fluffy texture, and a splash of vanilla extract brings everything together.
The key to achieving a smooth consistency is to ensure all ingredients are at room temperature before mixing. For piping, the frosting should be thick enough to hold its shape but light enough to spread easily between the cakes. Chilling the frosting slightly before piping can also help maintain structure, especially if you’re preparing them in a warm kitchen.
Garnishes That Complete the Wreath Look
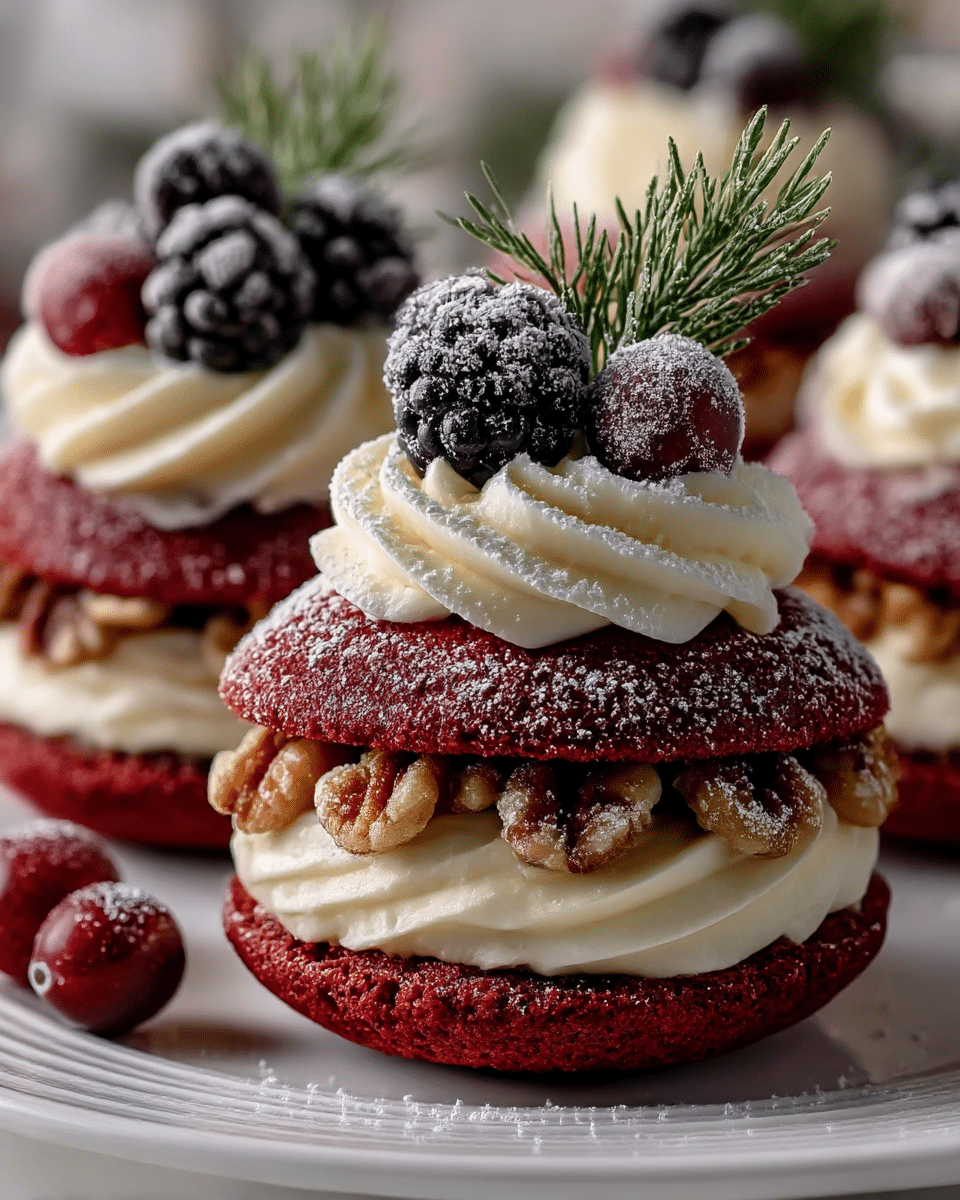
Presentation plays a major role in the charm of these whoopie pies. The garnishes turn simple cookie sandwiches into festive edible wreaths. Candied walnuts rolled along the edge add a pleasant crunch and golden shimmer. Fresh cranberries and blackberries introduce color contrast and seasonal flair, while sprigs of rosemary or cedar give a natural, wintry finish.
A light dusting of powdered sugar mimics snowfall and ties the design together. These thoughtful details create a dessert that is both beautiful and flavorful—worthy of a holiday centerpiece.
Red Velvet Wreath Whoopie Pies
![]()
Equipment
- electric mixer
- Piping bag or spoon
Ingredients
- 2 cups all-purpose flour
- 2 tbsp unsweetened cocoa powder
- 1 tsp baking soda
- 0.5 tsp salt
- 0.5 cup unsalted butter, softened
- 1 cup light brown sugar
- 1 large egg
- 0.75 cup buttermilk
- 1 tbsp red food coloring (gel preferred)
- 1 tsp vanilla extract
- 8 oz cream cheese, softened
- 0.25 cup unsalted butter, softened
- 2 cups powdered sugar
- 1 tsp vanilla extract (for frosting)
- 0.5 cup candied walnuts, finely chopped
- 0.25 cup fresh cranberries or blackberries
- 10 sprigs rosemary or cedar, for garnish
- 2 tbsp powdered sugar, for dusting
Instructions
- Preheat oven to 350°F (175°C) and line a baking sheet with parchment paper. In a bowl, whisk flour, cocoa powder, baking soda, and salt.
- In a separate bowl, cream butter and brown sugar until fluffy. Add egg, then buttermilk, vanilla, and red food coloring. Mix until smooth. Gradually add dry ingredients and stir just until combined.
- Using a piping bag or spoon, form 2-inch rounds on the baking sheet. Bake 10–12 minutes until set. Cool completely before frosting.
- Beat softened cream cheese and butter until smooth. Gradually add powdered sugar and vanilla. Beat until fluffy. Chill slightly before piping if needed.
- Pipe frosting on one cake round. Roll edge in chopped candied walnuts. Top with another round to make a sandwich.
- Pipe decorative swirl on top. Garnish with cranberries or blackberries and a rosemary sprig. Dust with powdered sugar for snow effect.
Notes
Nutrition
Disclosure: This post may contain affiliate links. As an Amazon Associate, I earn from qualifying purchases. I only recommend products I personally use, love, and trust.
Step-by-Step Guide to Making Red Velvet Wreath Whoopie Pies
Mixing the Red Velvet Batter for Soft, Springy Texture
Start by preheating your oven to 350°F (175°C) and lining a baking sheet with parchment paper. In one bowl, whisk together the dry ingredients: all-purpose flour, cocoa powder, baking soda, and salt. This combination forms the foundation of the cake’s structure and gives it a subtle chocolate flavor.
In a separate bowl, cream the butter and light brown sugar until the mixture is light and fluffy. This step is essential for incorporating air, which contributes to a soft and tender crumb. Add in the egg, followed by the buttermilk, vanilla extract, and red food coloring. Blend until the batter is smooth and evenly colored. Gradually incorporate the dry ingredients into the wet, stirring just until combined to avoid overmixing.
Using a piping bag or spoon, form uniform 2-inch rounds on the prepared baking sheet. Leave enough space between each round, as they will spread slightly during baking. Bake for 10 to 12 minutes, or until the tops are set and spring back when gently touched. Allow them to cool completely before assembling.
Assembling the Layers: Frosting, Walnuts, and Berries
Once the cake rounds are cool, prepare the cream cheese frosting by beating softened cream cheese and butter until smooth. Gradually add the powdered sugar and vanilla extract, beating until the mixture is fluffy and holds its shape.
Pipe a swirl of frosting onto the flat side of one cake round. Roll the frosted edge in finely chopped candied walnuts to add crunch and visual texture. Gently press another cake round on top to form a sandwich. For the wreath design, pipe a decorative swirl of frosting on top of the sandwich and carefully place a few cranberries or blackberries along with a small sprig of rosemary or cedar in the center.
Finish with a light dusting of powdered sugar for a snowy effect. Repeat the process for each whoopie pie until all are assembled.
Holiday Variations and Customization Ideas
Flavor Twists: Peppermint, Espresso, or Orange Zest
Red velvet is a flexible base that welcomes subtle twists without losing its identity. For a refreshing take, consider adding a touch of peppermint extract to the batter or frosting. Just a quarter teaspoon is enough to introduce a wintry brightness that pairs well with the richness of the cream cheese filling.
If you’re drawn to bolder flavors, a half-teaspoon of espresso powder mixed into the dry ingredients will deepen the cocoa notes and give the pies a mocha undertone. For a citrus lift, a teaspoon of finely grated orange zest in the frosting offers a fragrant contrast that feels both festive and refined.
These small changes allow you to adapt the recipe to different tastes or special occasions while maintaining its visual appeal.
Allergy-Friendly and Vegan Swaps
To make these whoopie pies suitable for guests with dietary restrictions, several substitutions work well. For a nut-free version, skip the candied walnuts and instead use crushed pretzels, toasted coconut flakes, or allergy-safe granola for texture. These alternatives still provide a satisfying crunch and visual decoration without introducing allergens.
If you need a dairy-free or vegan option, replace the butter with plant-based margarine and the buttermilk with almond milk or oat milk mixed with a teaspoon of vinegar or lemon juice. For the frosting, use vegan cream cheese and butter substitutes. Even the food coloring can be swapped for a natural beet-based version to keep everything plant-friendly.
These variations allow more people to enjoy the whoopie pies without sacrificing quality or presentation.
Serving, Storage, and Make-Ahead Tips
How to Serve These Whoopie Pies for Wow-Factor
Presentation plays a major role when serving these red velvet wreath whoopie pies. Arrange them on a white or dark wood platter to highlight the contrast of colors. Scatter a few extra sprigs of rosemary and fresh berries around the plate for a cohesive, seasonal display.
Serve the pies slightly chilled for the best texture—firm enough to hold their shape but soft when bitten into. These desserts work well as individual plated servings at a dinner party or as part of a dessert buffet where guests can help themselves. If you’re packaging them as gifts, place each pie in a cupcake liner and nest them in festive boxes for a polished finish.
Storing Them Without Losing Freshness or Texture
Whoopie pies are best enjoyed within a day or two of assembly, but they can be stored effectively with a few precautions. Place them in a single layer in an airtight container and refrigerate. To prevent sogginess, line the container with parchment paper and separate layers with additional sheets.
They will stay fresh for up to three days in the refrigerator. If you need to prepare them ahead of time, you can bake the cake rounds and freeze them—unfrosted—for up to two weeks. Wrap them tightly in plastic and store in a sealed freezer bag. Defrost overnight in the fridge and frost just before serving for best results.
Frequently Asked Questions About Red Velvet Wreath Whoopie Pies
What makes red velvet whoopie pies different from traditional whoopie pies?
Traditional whoopie pies are usually made with chocolate cakes and a marshmallow or buttercream filling. Red velvet whoopie pies offer a more refined flavor profile with mild cocoa, a hint of tang from buttermilk, and a cream cheese-based frosting. The red color and festive toppings also make them more visually suited for the holiday season.
Can I make red velvet whoopie pies ahead of time?
Yes, the components can be made in advance. The cake rounds can be baked, cooled, and frozen (unfrosted) for up to two weeks. When you’re ready to serve, thaw them overnight in the refrigerator and assemble with fresh frosting and toppings for best results.
What’s the best way to store whoopie pies without them getting soggy?
Store assembled whoopie pies in a single layer in an airtight container lined with parchment paper. If stacking, place parchment between layers. Keep them refrigerated and enjoy within three days. Let them sit at room temperature for 10 minutes before serving for ideal texture.
How do I achieve a rich red color without overusing food coloring?
Use gel-based food coloring rather than liquid—it’s more concentrated, so you can use less. Pair it with a lighter cocoa powder to allow the red color to come through more clearly without needing excess dye.
Conclusion
Red Velvet Wreath Whoopie Pies are more than just a dessert—they’re a celebration of flavor, color, and festive creativity. With soft red velvet cake rounds, tangy cream cheese frosting, and elegant seasonal garnishes, each whoopie pie becomes a miniature edible wreath that’s as visually impressive as it is satisfying to eat.
These treats offer versatility for any occasion, from holiday parties to handmade gifts. Whether you stick with the classic version or experiment with new flavors and dietary tweaks, this recipe allows for both tradition and personalization. With a little care in preparation and presentation, they’ll quickly become a seasonal favorite in any home baker’s repertoire.
Looking for more creative treats to complement your dessert table? Try the indulgent Chocolate Pistachio Lava Cake or the beautifully crisp Ricotta and Pear Filo Cigars, both ideal for winter entertaining.
Don’t miss the next viral recipe—follow me on Facebook and save every masterpiece to your Pinterest boards!

